Thursday, 20 August 2015

Feel Unique and Holland & Barrett Haul


I recently ordered some bits from Feel Unique and Holland & Barrett and thought I'd show you what I got! There's only one product in here that's a repurchase, the others are brand new products I wanted to give a try.
(All products are linked below the images)

Feel Unique:


La Roche-Posay Effaclar Duo[+]:
I got three things from Feel Unique and I might as well start with the one that's a repurchase. This moisturiser is a holy-grail product of mine, it is by far the best moisturiser I've ever used and definitely does everything it's supposed to. It's perfect for my oily/combination/blemish-prone skin. I'm sure you've heard enough people go on about this in the past few years so all I'm going to say is, you need to try it!

Yes To Grapefruit Dark Circle Correcting Eye Cream:
Now we've got my repurchase out of the way I can go on to talk about the products I'm still yet to try. I got this eye cream as I've been looking for one for a while but can never seem to find one that will get rid of dark circles and also reduce fine lines. I have a problem with both, and didn't want to spend loads or have to buy two different products as I felt applying two products may feel too heavy or cakey on my under-eyes. I settled on this one as the reviews were all pretty positive and some people said it helped reduce fine lines too, win win. This has a really smooth texture, it's not too strongly scented either. It is made from 99% natural ingredients, which is another reason I settled on purchasing this one. 

TIGI Bed Head Small Talk:
I heard someone talking about this when I was in the hairdressers the other day and thought it would be perfect for my hair. The woman that had come in was wanting to buy some and was raving about it, my hairdresser agreed it was amazing and that's why they were out of stock. So as soon as I got home I googled it and, sure enough, everyone seemed to be raving about it so I thought I best get myself some! This smell of this is b-e-a-utiful! (Name that film). I put a bit on the back of my hand to see what the texture is like and it doesn't seem sticky or greasy at all so I'm really looking forward to trying this out. It says it's a 'Thickifier, Engergizer and Stylizer', I'm hoping it'll be a perfect match for my hair as it can be very flat and hard to add volume and texture too.


Also from Feel Unique, when you spend over £30, you get to choose 2 free samples (There's 6 to choose from). I chose the I AM JUICY COUTURE perfume sample and the Emma Hardie Amazing Face Protect and Prime SPF30. The perfume has a fruity but flowery smell to it, it's also slightly musky, which I like. I can't comment on the Emma Hardie product as I don't want to open it until I want to use it but I've heard good things about her range. 

Holland & Barrett:


Bioglan Superfoods Supergreens Powders:
I don't often buy things from Holland & Barrett but I'd heard something about these vegetable powders that give you your 5 a day in one drink. Now, I don't eat much fruit and veg at all, I just don't like the taste or texture. I'll have a small portion every now and again, but I probably don't even have 5 portions in a week, never mind a day. When I heard about these I started to do a bit of research as I thought they'd be great for me to get my 5 a day without having to actually eat the vegetables. Anyway, I found out about these and all the reviews are amazing, everyone says how much more energy they have and how they've helped them feel more healthy. These are quite expensive (£21.99 for a 100G packet), but I got them in the penny sale so got both packets for just £22, which seems pretty good to me! There's a few different one's but I chose the '81 Vital Ingredients' and 'Berry Burst' ones as they had the most ingredients. I'll probably be doing a review once I've tried these so keep your eyes peeled for that.

I hope you enjoyed my little haul of products I've bought recently. 

Becky
XO 

Psst... All my social media accounts are linked to the right of this post. There you'll also find a button to follow my blog on Bloglovin', or you can click here! 

Monday, 17 August 2015

My Top 3 Photo Editing Apps for iPhone


I think the key to a good photo editing app is a simple and user friendly design. Most of these apps have very similar features but, to be honest, I use all of them equally as they do vary slightly. All the apps that I am going to talk about have the option to post straight to your social media accounts, such as Instagram, Facebook or Twitter, or you can save to your camera roll. 

1. A Beautiful Mess - Price: Free


When you first open this app you are greeted with this screen (first image). It gives you the option to either work with one picture (Solo) or make a collage of multiple images (Collage). For this example I chose 'Solo' so the middle image is the next screen you get. You can now choose to add a picture, background pattern/colour or crop, I chose colour. I selected my colour and then you are given some more options, you can add a filer, border, doodle, text or phrase. The phrase I chose is a pre-made one that comes with the app. I find this app great for creating typography images of quotes.

2. Instasize - Price: Free


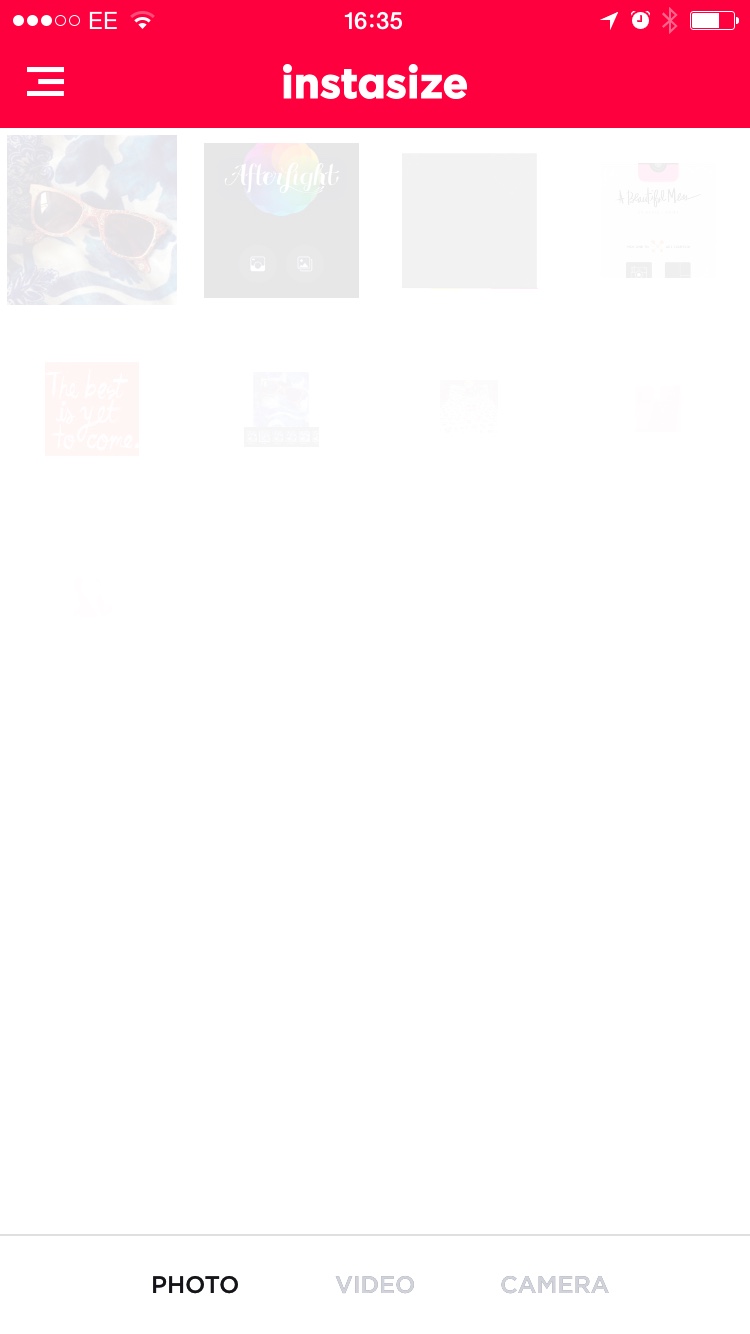
Next up is Instasize. When you first open the app your photo library will open on the screen, along the bottom there is an option to switch from 'photo' to 'video' or 'camera'. Once you select your image it will put it in a box (screenshot on the right). I find this app best for when you don't want to crop any of an image to post on Instagram. For example, say you have a nice landscape image and you don't want cut anything out, you can pop over to Instasize and it will centralise your image in a box. You can then put filters on this, create a collage, add a border/background image, adjust, add stickers, text overlays or crop.

3. Afterlight - Price: Free


Afterlight might be one that a lot of you have heard of as it seems to be quite popular. The apps welcome page is similar to the one for A Beautiful Mess, you get the option to either take a picture or choose an existing image from you camera roll. When you choose your image it will ask you if you want to continue, when you click 'use' you will see this next screen (right screenshot). Here you can edit your image using the usual tools, add a filter, boarder or crop. 


So that's it, they're my top 3 photo editing apps!

I hope you enjoyed this post, if you have any photo based app recommendations then leave them below in the comments :)

Becky
XO 

P.S: All my social media accounts are now linked to the right of this post. There you'll also find a button to follow my blog on Bloglovin', or you can click here.

Tuesday, 11 August 2015

Introducing Me...


Hey there! This is my 10th post so I thought a little introduction was in order. 

I'm Becky, 22 from Sheffield, England. 

Last year, November 2015 to be a bit more precise, I graduated from York St John University with a 2:1 in Film Studies and Media. I currently work in retail while I try and figure out what to do with my life! I really enjoy writing and expressing myself, so this was one of the main reasons I decided to start this blog.

Although I love writing, I've never been able to keep a diary, I can't even handle a 'One Line A Day' diary. I just find them so tedious and boring, I just basically ended up writing the same thing each day.

Whereas with this blog I get to talk about products and food and life in general, which is a lot more exciting to me!

I'm really looking forward to connecting with others bloggers, both near and far, and joining this amazing community of creative and like minded people.

I'm not sure what else to put here so if there's anything you want to know, feel free to ask in the comments :)

XO 


Monday, 10 August 2015

Go Emoji Crazy With Birchbox's August 2015 #Beautyjunkie Box


This is the cutest Birchbox I have received so far! It's got all these little beauty themed emoji's all over is and I just think it's so lovely and playful.

In the box you get the usual information booklet along with 6 beauty/hair products in a drawstring bag. Also in this month's box you get a set of emoji stickers, you can just see them peeping from behind the lid of the box in the picture above.


1. Rituals Rice Scrub - Organic Rice Milk and Cherry Blossom. 
This smells DIVINE. As soon as I smelt it I basically made my mum smell it too because it's just that good! It smells so fresh and clean, if that even makes sense. The scrub is quite coarse so will be good for exfoliating legs to get rid of any dead skin cells before hair removal. It states in the booklet that it can be used on sensitive skin and when it comes into contact with water it turns into a foaming cream. I can't wait to try this one out!

2. Kebelo Clarifying Shampoo.
To be honest, this doesn't really smell of anything. I don't mind that it doesn't have a scent because, on the bright side, at least it doesn't smell awful. I quite like clarifying shampoos because I have an oily scalp and they help to get rid of any excess oils and product buildup. It says to apply once or twice a month, I believe this is so you don't remove too much of your natural hair oils as this can cause your scalp to become dry and irritated. 

3. BioNike Cleansing Water.
This is a fragrance-free cleanser that is suitable for 'hypersensitive and intolerant skin'. It is meant to sooth spots and leave skin feeling smooth and soft. Apparently you massage this into your face and neck using your fingertips, afterwards you wipe off the excess with a cotton pad, sounds interesting! One thing I like about receiving these little samples from Birchbox is that they are great to use when travelling. My normal cleansing water/toner is in a largish bottle, so now I can just take this instead. 


4. thebalm Cosmetics Balm Desert Bronzer.
A teeny bronzer sample from thebalm. The last product I received in my Birchbox from thebalm (the Cindy-Lou Manizer) was really good so I'm looking forward to using this. It's a really subtle and natural shade, perfect for my pale skin! There's a tiny bit of shimmer but nothing too over the top. 

5. Lord & Berry Blush in the shade Lotus.
This is a gorgeous rosy pink coloured blush, perfect for giving you that natural rosy cheek look. The booklet says that this is buildable so you can either create a natural look or add a pop of colour to your cheeks buy building it up. The texture of this is lovely, very silky smooth.

6. L. Erickson Grab & Go Ponytail Holder.
To put it simply, this is a hair bobble (or hair tie, whatever you may call them). There is no metal on the bobble which means no snagging! I probably wouldn't go out with my hair in this because it's silver/grey and my hair is a darkish brown so it stands out a mile. However, it'll be perfect for bed or when I'm doing my make up. 


There you have it, that's this months Emoji crazy Birchbox in a nutshell!

I hope you enjoyed this post, if you want to be updated on my latest posts you can follow me on Bloglovin' by either clicking the widget to the right of this post or by clicking here :)

Becky
XO


Wednesday, 5 August 2015

Super Easy Australian Crunch Recipe


This is one of my families favourite things for me to bake and it's oh so simple! 

What You'll Need:
400G Margarine
300G Caster Sugar
150G Desiccated Coconut (Optional)
150G Crushed Cornflakes
2TBSP Coco Powder
300G Self Raising Flour
400G Melted Chocolate (Optional)
Baking Tray (10"x12")
Foil
1 Large Bowl
1 Medium Bowl
Tablespoon
Wooden Spoon
Weighing Scales
Sieve


First up, you'll need to set your oven to Gas Mark 4 or 180 C. You will also need to prepare a baking tray. The tray I'm using is 10"x12" and fits the mixture perfectly. To prepare your tray, line with foil and spread a small amount of butter on the foil, this will prevent the mixture from sticking. The foil and butter also help for easy removal.


Next, you want to melt your margarine and half of your chocolate (200G) over a pan of boiling water. This is the safest way to melt your ingredients and will ensure they don't burn.

If you want to cut down on calories, you can make this without the chocolate, the recipe will work fine without it.


Whilst the chocolate and margarine are melting you can prepare your dry ingredients, so this is the flour, sugar and cocoa powder. It doesn't matter what order you prepare your dry ingredients, they will all be added to the rest of the mixture at the same time so can be kept altogether in one bowl. 

For Cocoa powder I'm using Cadbury's Bournville as it's quite rich tasting and perfect for baking, but you can use any brand you might have laying around or, if you're on a budget, whatever's cheapest at the store. 


Another ingredient you'll also need to prepare is the crushed Cornflakes. To do this, simply measure out 150G of cornflakes on your scales (preferably in a jug or bowl so not to make a mess everywhere!) and then crush them with your hands. If you don't like using your hands you could use the end of a rolling pin.


This is what the butter and chocolate should look like when they have melted, they won't be completely together, it's likely the butter will be floating on top of the chocolate. This is not an issue.


Next up, add your crushed Cornflakes into the melted ingredients and stir them together.


After your Cornflakes have been added you will need to sieve the dry ingredients into the mixture. Like I stated before, these can all be added at the same time so there is no need to try and separate them out. Just make sure you sieve these so no lumps are formed. 


Once you've stirred all the ingredients together your mixture will look something like this. 


Simply pour the mixture out of the bowl and into your baking tray or tin, make sure to even the mixture out so you don't get an uneven depth. 

The mixture will look quite 'boggy' but don't worry, this will disappear once the Australian Crunch has been fully baked. If you wish, you can remove some of the oil by tipping the tray to the side and draining with a spoon. 

Finally, pop the tray into the centre of your preheated oven and leave to cook for around 25 minutes. When you take it out of the oven it will appear to be gooey in the middle and may appear uncooked but as long as the top part looks cooked, the middle will settle and solidify when it cools down. 

If you want, you can melt down the rest of your chocolate (200G), in the same way we did in the first step, and then add this to the top of the cooled Australian Crunch. However, this is, again, totally optional. 


Happy Baking (and Eating)!

To keep updated with my blog posts follow me on Bloglovin' by clicking either here or on the '+Bloglovin'' button to the right of this post :)

Becky 
xo


Monday, 3 August 2015

How To Save Your Suede Shoes With One Little Tool

So I was having a bit of a clear out and I found out a pair of suede heels that I don't wear anymore so decided I was going to try and sell them on Depop. They were a bit worn and scuffed and needed sprucing up a bit. I asked my Mum if she had any ideas and she told me to try a suede brush. To cut a long story short, it worked amazingly, so much so that I went and used it on all of my other suede shoes. 

Today I pulled out this pair of heels and thought they were beyond hope, but as you'll soon see, they now look as good as new! So here's how to get your old looking heels and shoes back to their former glory.

What you'll need:
  • Worn/Scuffed Suede Shoes
  • Suede Brush 


This is the suede brush I used on my heels. It's nothing fancy, just some brass wire bristles on a wooden handle. You can get one similar here and they aren't expensive at all.


Once you've got your brush, you want to grab your shoe and hold it firmly so it won't slip out of your hand. I opted to put my hand inside mine as this allowed me to hold the shoe steady. When you have hold of your shoe, get brushing.

Tips:
  • I find that swirling the brush in small circular motions works well.
  • Brush 'against the grain', if your scuff is horizontal, brush vertical.
  • Don't be afraid to be quite rough.
  • Don't give up, it may take a good few minutes to get the desired result.

A scuff occurs when something has scrapped down the side of your shoe and, effectively, flattens the suede down. What using a brush does is fluff the suede back up. 

Before:


This is what my shoe looked like before using the suede brush. These scuffs were quite deep and at one point I didn't actually think they were going to come out.

After: 


This is the end result! As you can see the scuffs are invisible. The area where I've used the brush looks slightly difference to other areas of the shoe, but once you brush round the edges and flatten it out, it looks as good as new.

I hope this helps some of you, if you have any questions, please feel free to comment below!

To be updated on my new blog posts, follow me on Bloglovin' :)

Becky
XO

Friday, 10 July 2015

Best Highstreet Make-up Buys

Most of the make up products I use are from either Boots or Superdrug and are high-street brands, I only use one high-end product in my daily make-up routine, so I thought this would be the perfect post for me to do. The reason I only really use high-street products is because I don't see the point in spending loads of money on make-up when brands such as Maybelline and Revlon are just as good. 

A lot of the face products featured in the post are geared towards oily/sensitive/combination skin, so if you fall into that category, these should be perfect for you.

May have cheated slightly by using a Ted Baker make-up bag, but it was a gift, so no harm done!
Unfortunately, it's last season so it's no longer available.

Face Products

From Left to Right:
Boujois Healthy Mix Serum / L'Oreal Paris Infallible Mattifying Primer / Revlon Colourstay Concealer

L'Oreal Mattifying Primer:
Primer isn't a product I use every day. I use it when I know I'll be out a while and there'll be lots of pictures being taken so I want my skin to look flawless, such as special occasions or nights out. This primer is the best one I've ever used, I'd tried a few before this but they always seem to go 'bobbly' when I put my foundation on top. The reason I like this one is that it's very smooth, doesn't feel heavy on the skin and, best of all, it's mattifying. I've talked before about my oily skin and this definitely makes the oil stay away and keep my make up looking shine free.

Boujois Healthy Mix Serum:
I also don't use foundation every day, but this is definitely the one I reach for when I do. I'm sure a lot of you will have heard about this foundation before as it has been raved about a lot! This is a Gel Foundation, which is something I'd never heard of before I tried this, and let me tell you, I'm so glad I decided to try it, it is by far the best foundation I've ever used. Due to the gel formula it's glides on skin and isn't heavy in the slightest. It's quite runny when you first pump it out but then when you start to apply it, it seems to thicken and create a beautiful finish on the skin. I've used a large range of foundations in my time and never before stuck with one as long as I've stuck with this. My shade is '52 Vanilla'.

Revlon Colourstay Concealer:
This concealer is one of my everyday products (by everyday I mean when I'm leaving the house for longer than 15 mins!). I tried the Collection concealer that's mentioned everywhere but found it was too thick and didn't blend well, also the shades didn't match my skin well, one was too light and the other too dark. That's when I came across this beauty. I'm shade '02 Pale' and it matches my skin perfectly. It's light on the skin but easily covers blemishes and dark circles.


Soap & Glory One Heck of a Blot Powder

Soap & Glory One Heck of a Blot:
This is a translucent powder designed to get rid of excess shine and oil and mattify the skin. As use this powder as it allows for your skins natural colour to come through, I only use this in the summer when I have been on holiday and got a bit of a tan. In the winter I switch to a coloured powder to add a bit of warmth to my skin. This powder does what it says on the tin(?), mattifies the skin and gives a 'ultra-light, smooth velvety finish'.


Seventeen Define and Conquer Contour Kit

Seventeen Contour Kit:
Next up is this Contour Kit by Seventeen. I started using this because I needed a new bronzer, saw this and thought I might as well try it out as Seventeen products are usually pretty good. This comes in different shades, mine is in 'Fair'. In all honesty, I don't often use the highlighter side, only because I tried it and didn't think it did much for me. As for the bronzer side, I find it is great for my skin tone as it's doesn't go on too heavy and is matt (no shimmer) so looks natural.


Natural Collection Blusher

Natural Collection Blusher:
This is probably the cheapest product out of all the ones featured in this post, at only £1.99, it's a steal! The colour I use is 'Peach Melba'. I use this all year round as it gives a very warm peach tone to the cheeks and looks extremely natural. 

Eye/Eyebrow Products

Left to Right:
Revlon Lash Potion / Soap & Glory Supercat Liner / GOSH Kohl Liner / Soap & Glory Archery Eyebrow 2-in-1

Revlon Lash Potion:
My eyelashes are very straight with barely any curl in them so I've tried countless mascaras to try and make my eyelashes curl and stay curled. This mascara does just that. It gives eyelashes amazing lift and volume, helps them to stay curled all day. The brush is quite big and has bristles (not plastic) so it grabs every lash.

Soap & Glory Supercat Felt Liner:
If you're a felt liner kind of person, this is definitely one you should check out. It stays on all day and dries quickly so it never smudges. The nib has a fine tip so you can create really thin lines or super thick ones, you only have to draw the line once to get a jet black finish.

GOSH Kohl Liner:
This liner glides on so smooth, it doesn't drag the eye lid at all. It stays on all night without transferring onto the upper lid, but if you wanted it's creamy enough to smudge out and create a dramatic smokey eye. I've used this for years and never found another eyeliner that lives up to it. 

Soap & Glory Archery 2-in-1:
As you can see from the image, this product is so well loved all the information has come off the tube. One end of this is an eyebrow pencil which is a twist up, so no need to sharpen, and the other end is an eyebrow brush. I use this very lightly to define my eyebrows and then brush out to make them look natural. The colour I use is 'Hot Chocolate'.


Maybelline The Nudes Eyeshadow Pallette


Maybelline The Nudes:
I bought this last month whilst I was in the airport as I wanted a powder to use to fill my eyebrows and thought this would be perfect as I can use it for both my brows and my eyes. The reason I pencil and then also fill my brows is because my eyebrow hairs are quite thin and can look sparse, so I use both to create a fuller look. You can probably tell the ones i usually use for my brows are the two at the top right and the second one in from bottom left. There are also some beautiful shimmer colours to create a lovely bronzed eyeshadow look. These eyeshadows are very pigmented and have amazing staying power.

What are your favourite high-street beauty products?

If you'd like to be updated on my latest blog posts you can follow my blog on Bloglovin' by clicking the '+Bloglovin'' tab to the right or by clicking here.

Becky
XO